CategoriesUncategorized

Aseptic Health LLC Unveils Revolutionary Cleaning Technologies with Newly Patented SoRite DECON and Disinfectant – Completely Redefining Safety and Efficacy in the Industry

Nashville, TN – In an unprecedented leap in cleaning and safety technologies, Aseptic Health™ LLC proudly announces the granting of U.S. Patent No. 11,944,097, marking a new era for decontamination and disinfecting solutions worldwide. This milestone patent, awarded on April 2, 2024, underscores the company’s relentless pursuit of innovation with its groundbreaking products: SoRite ® DECON and SoRite ® Disinfectant.

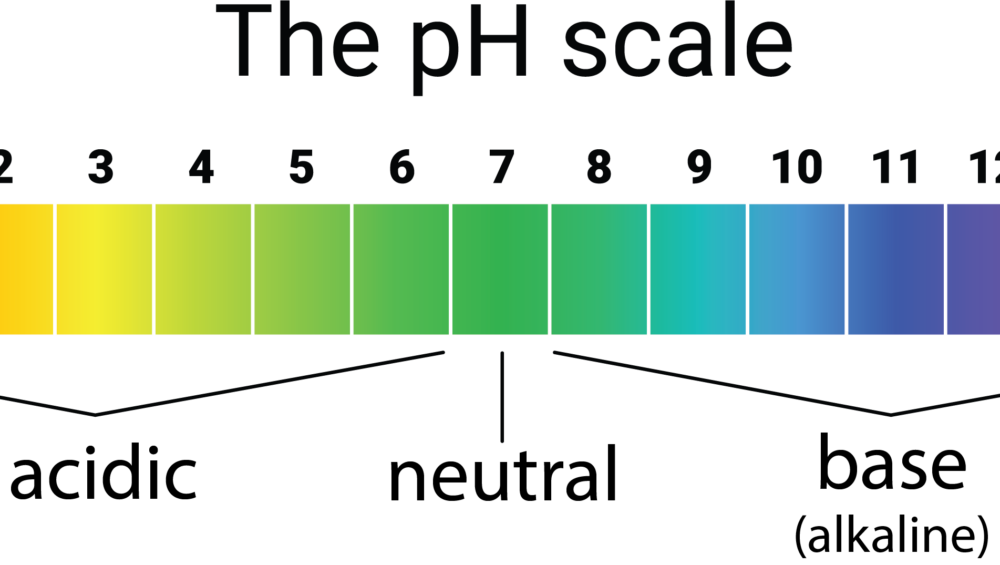
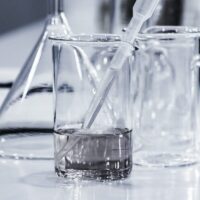
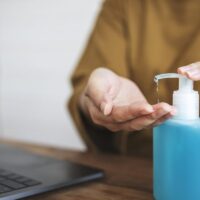
SoRite DECON (https://soritedecon.com/), a fast-acting decontaminant, revolutionizes the fight against narcotics, including fentanyl, xylazine, and heroin, by oxidizing these threats within 60 seconds. Boasting a unique formula that harnesses the power of Sodium Chlorite at low concentrations, SoRite DECON is safe for skin contact and surfaces alike, posing the lowest toxicity category. This remarkable achievement is the fruit of rigorous testing at FDA and DEA accredited laboratories, ensuring unparalleled effectiveness and safety.

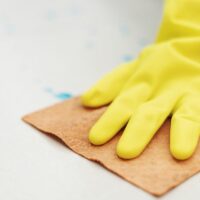
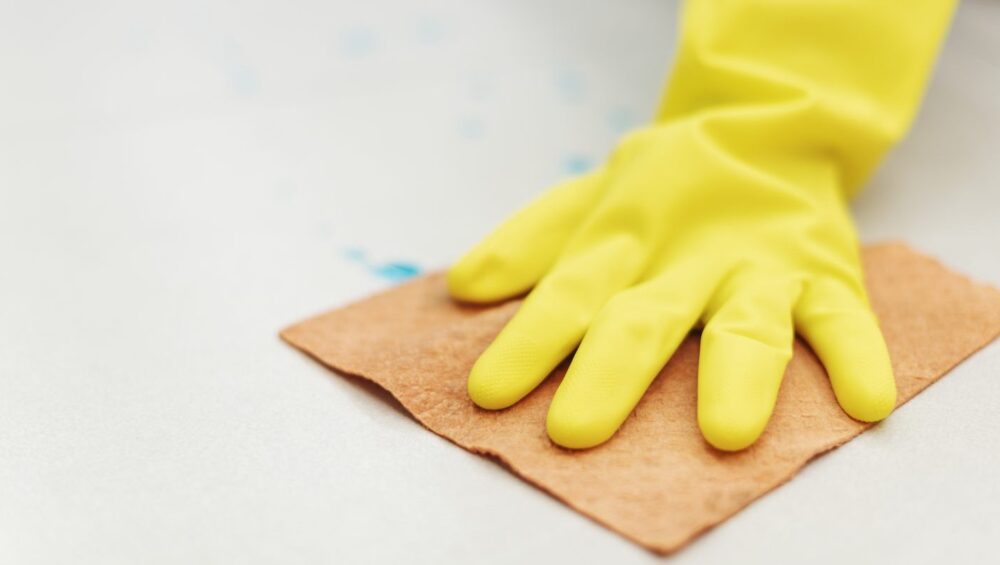
Similarly, SoRite Disinfectant (https://sorite.com/) emerges as a multi-purpose marvel, eradicating 99.9% of bacteria and viruses in just 15 seconds. Its potent, non-toxic formula, free from harsh chemicals and residues, makes it a versatile solution for an array of cleaning needs. Both products, embodying Aseptic Health’s mission for safer, innovative cleaning solutions, are proudly made in the USA and uphold the highest standards of quality and safety.

Autumn Ryan, Founder/CEO of Aseptic Health and a trailblazer in the cleaning industry, reflects on the skepticism she often encounters: “When I share how our products can change the cleaning paradigm, I hear doubts – ‘this is too good to be true.’ Yet, patents don’t lie. We’re not just introducing new products; we’re ushering in a new era of cleaning technology.”

Under Ryan’s visionary leadership, Aseptic Health has championed the “New Clean. More Life.®” philosophy. The company’s commitment to transforming cleaning, sanitizing, and disinfecting practices worldwide is not just about innovation; it’s about improving quality of life and making the world a safer place.

As Aseptic Health LLC continues to break new ground, its focus remains on creating solutions that are not only effective but also safe and sustainable for people and the planet. With SoRite DECON and SoRite Disinfectant, Aseptic Health is not just cleaning spaces; it’s redefining what it means to be truly clean.

For more information about Aseptic Health and its revolutionary products, visit https://aseptichealth.com/.

About Aseptic Health LLC

Founded in 2015 by Autumn Ryan, Aseptic Health LLC aims to redefine the cleaning industry through innovative, safe, and effective solutions. Headquartered in Nashville, TN, the company’s mission is to introduce new technologies that ensure cleaner air, food, and water, contributing to a healthier world. With a focus on education and the development of pioneering cleaning practices, Aseptic Health is dedicated to certifying spaces as Clinically Clean® for the good of humankind.

Contact:

Phyllis Rose

Marketing Director

Aseptic Health LLC

(888) 379-3232

[email protected]

CategoriesClean Tips How To's

5 Tips For Safe Cleaning

Tips For Safe Cleaningby Dana Ryan, Certified Clinically Clean® Specialist

Whether you’re cleaning your own home or you work as a cleaner, janitor or custodian for a cleaning company, it’s important to know these tips for safe cleaning.

The top cause of accidental home injury death is from falls, claiming nearly 6,000 lives per year according to the Home Safety Council. Janitors and cleaners are more likely to suffer overextension injuries, but slips, falls and trips is number two in the cleaning industry, causing 15% of accidental deaths according to the Occupational Safety and Health Administration (OSHA).

Before we explore five important tips for safe cleaning, one all-encompassing directive especially for cleaning professionals is “know your surroundings.” Know where light switches are located. Know where items are usually placed. Being familiar with your surroundings will help you be better prepared to react in case something is out of the ordinary—like that open file cabinet drawer just waiting to be tripped over!

1. Prevent Slips, Falls & Trips

Slips, falls and trips make up majority of general industry accidents according to the US Department of Labor with over 17% of all disabling occupational injuries from falls. And most could have been prevented.

Slips most often occur due to wet or dry product or spills on smooth floors or walking surfaces, making them slippery. Highly polished floors (concrete, marble and ceramic tile) or freshly waxed surfaces can cause slips. As can transitioning from one surface to another such as from carpet to vinyl or hardwood.

When cleaning, take care to prevent slips, falls and trips by adhering to these guidelines:

  • wearing footwear with enough traction
  • keep your work area properly lit
  • avoiding obstructions, such as cords, along walkways and entrances

2. Chemical safety

Read labels carefully. The fewer chemicals you use, the less likely you are to have an accident related to chemical use (or abuse). One of the most frequent chemical accidents is caused from mixing the wrong chemicals.

If your cleaning chemical contains bleach, don’t mix it with anything. Even bleach and lemon juice can result in the production of chlorine gas. Mixing bleach and ammonia is especially harmful. An example of a common cleaning product that contains ammonia is glass cleaner.

Keep the area where you’re cleaning well ventilated.

You’ll also want to read the label to determine if any personal protective equipment (PPE) should be used. The right equipment such as gloves, goggles and masks can prevent severe injuries to the eyes, head, lungs, hearing and skin.

3. Prevent Sprains, Strains and Back Injuries

Repetitive motion can cause musculoskeletal injuries, especially if you are working regularly as a cleaner, janitor or custodian. Your employer is required by OSHA to provide you with the proper cleaning procedures and equipment, but it’s up to you to make a conscious effort to use the proper tools.

When performing repetitive motion, such as vacuuming, take a break to stretch and give your muscles a rest. This even applies to the same tasks at home. Instead of doing all the vacuuming at once, intersperse a task that uses a different set of muscles.

4. Keep Away From Children

Always keep cleaning products and electrical equipment used for cleaning in a safe place, away  from children( and pets for that matter). It’s always a good idea to rinse out your cleaning rags and buckets after using cleaning products as well. And, reseal opened cleaning products tightly.

5. Sometimes It Takes Two

While you can do the majority of housework alone, there are some tasks that take two to complete safely.

Moving heavy items: Ask for help when moving heavy furniture, large rugs or pulling your fridge out to clean behind it. Your back and knees will thank you.

Cleaning up high: Make sure there’s someone on hand to steady the ladder or spot you when you’re cleaning light fixtures, high windows, ceiling fans, the tops of shelves or even taking down tall drapes.

CategoriesClean Tips How To's

How To Vacuum And Mop Like A Pro

vacuum and mop like a pro 
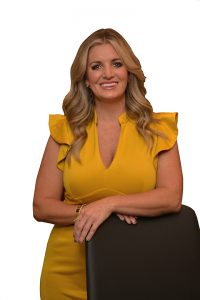
by Autumn Ryan, Founder and CEO of Aseptic Health

Want a clinically clean home? Then brush up on your vacuuming and mopping techniques and learn how to vacuum and mop like a pro. Vacuum first. Then mop. Here’s how.

The Cutting Edge

Wondering where to start? Start by vacuuming the edges of your floors with your vacuum’s crevice tool. Airflow across a hard surface floor will blow dust, pet hair and other debris into the corners and edges of the room.

Likewise, carpeted surfaces will gather dust and dirt around the edges. If left over time, the edges of the carpet can become permanently discolored.

Continue vacuuming all rooms as described below before mopping any of your hard surface floors.

Changing Directions

To thoroughly vacuum clean carpets and rugs, make sure you’re not vacuuming in just one direction. Why? Debris can get trapped in carpet fibers and going in one direction alone will not remove all of it. If you’re going to vacuum and mop like a pro, take two passes with your vacuum. Vacuum the entire space north to south, then change direction and re-vacuum east to west.

The same with mopping, mop twice if your hard surface floor is extremely dirty.

The Strategy

If you’re going to vacuum and mop like a pro, you’re going to need a strategy. Begin at the farthest corner from the door and literally vacuum or mop your way out of the room.

If you have pets, don’t just vacuum the floor, vacuum other places they may sit or lie down such as pet bedding, chairs and sofas. Apply the same north to south and east to west technique described above to pick up allergy-causing pet dander from chairs, sofas and bedding.

Surface Changes

When going from hard flooring to carpet or rugs, make sure you adjust your vacuum cleaner’s height or power level.

With your mop, take care not to leave wet puddles when changing surface height from say a stone floor to a linoleum floor. Also use the right tool for the job. If you’re mopping a tile floor, a smooth microfiber mop head may not be adequate to reach into the grout like a thicker microfiber loop can.

Nice and Slow

You don’t get a deep clean when you zip through the room at a fast pace. If you want to vacuum and mop like a pro, take it nice and slow. This allows your vacuum to agitate carpet pile correctly and suck up more of the dirt. On hard surfaces, a slow gait allows the machine to suck up larger pieces of debris.

When mopping, you’re less likely to miss spots and spills when you take it more slowly.

Cleaning Your Equipment

Avoid letting your vacuum cleaner bag or canister get too full. It will compromise the suction ability of your machine. You should also clean the filter frequently to prevent dust from being recycled (and to cut down on odors).

Cleaning your mop during use is equally important. Once your mop head gets full of solution and dirt, you’ll need to rinse thoroughly before reuse or you’ll just end up pushing dirt around. And that means pushing germs around as well. Rinse until there’s no more dirty water. In fact, I like to use two mops. One for cleaning, the other for rinsing.

Best Brands

There’s a wide variety of equipment available today from central vacuum systems, to upright vacuums, canister vacs, even “stick” vacuums and robotic vacuums. Those with a HEPA filter are a plus if you’re prone to allergies. A vacuum rated for pet hair is desirable for those with cats and dogs.

Mops come in even more varieties. There’s even a robo vacuum/mop combo, but we have not tried it. There are steam mops, and a range of microfiber mops. The only mop we don’t recommend is the conventional cotton loop mop that’s bulky and difficult to rinse.

If you need to wet mop—such as in commercial situations—there are microfiber, heavy duty wet mop heads, or microfiber spin mops. For the home, use a damp mop. Buy extra mop heads so that you’re never mopping with a dirty mop. And don’t use the same mop in the kitchen that you used in the bathroom and vice versa. Using the same mop in different rooms leads to cross contamination of bacteria and viruses.

For more information on avoiding cross contamination, see our DisinfecTips here.

CategoriesClean Tips How To's

How Is Cleaning Product Toxicity Measured?

Cleaning Product Toxicity
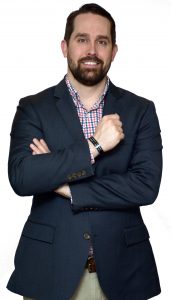
by Stephen Lawson, COO and Certified Clinically Clean® Specialist

The toxicity of a substance can be measured by the effect it has on an organism, a tissue or a cell. We know that individual animals will respond differently to the same dose of a substance because of a number of factors (gender, age, body weight, etc.) which is why toxicity laboratories measure effects over a total population.

Many different species of animals are used in testing around the world although generally labs favor testing on white mice.

Cleaning products are a necessity for maintaining healthy conditions in the home and workplace. And it’s important to remember that cleaning products may contain chemicals that can harm you. That is why animal testing is necessary to measure cleaning product toxicity.

The Environmental Protection Agency (EPA) requires testing disinfectants and some sanitizers for eye, skin, oral and respiratory irritation.

Disinfectants Are Pesticides

The term “pesticide” covers a large range of products from insecticides and herbicides to sanitizers and disinfectants. In the eyes of the law, sanitizers and disinfectants are considered to be pesticides and are managed by the EPA Office of Pesticide Programs.

The term “pesticide” is commonly used to refer only to insecticides, but it actually refers to all substances used to control pests.  Sanitizers and disinfectants kill bacteria, viruses and fungi, which are considered to be pests, just as insects, weeds, snails and slugs are considered pests.

In addition, the EPA further classifies disinfectants as antimicrobial pesticides.

Antimicrobial pesticides are intended to disinfect, sanitize, reduce or mitigate growth or development of microbiological organisms. In addition, they may protect inanimate objects, industrial processes or systems. And may protect surfaces or water from contamination, fouling, or deterioration caused by bacteria, viruses, fungi, protozoa, algae, or slime.

Warning Labels

The concentrated forms of some commercial cleaning products are classified as hazardous, creating potential handling, storage, and disposal issues for users. The label details everything you need to know to use the product safely. In all cases the disinfectant or sanitizer’s label has been written according to the EPA’s 282-page Label Review Manual, then reviewed and approved by the EPA before a manufacturer can print their packaging label.

Signal Words

Depending on the toxicity level of the product as determined by the acute toxicity review, the EPA assigns the label one of three “signal” words. The lowest category of cleaning product toxicity will simply have the word CAUTION on the label. Higher categories of toxicity will have WARNING or DANGER on the label. All labels must read KEEP OUT OF REACH OF CHILDREN on the front of the label regardless of toxicity category.

Cleaning Product Toxicity Categories

The EPA has established 4 categories for acute hazards of pesticide products.

Toxicity Class 1:  This is the most toxic rating. The label of a Class 1 product requires the signal word – “Danger – Poison” with a skull and crossbones symbol.  This may be followed by other phrases including:

  • “Poisonous if inhaled,”
  • “Extremely hazardous by skin contact – rapidly absorbed through the skin” or
  • “Corrosive – causes eye damage and severe skin burns”

Class 1 materials are considered to be fatal to an adult human at a dose of less than 5 grams (less than a teaspoon).

Toxicity Class 2:  Class 2 products are moderately toxic.  The signal word is “Warning,” possibly followed by:

  • “Harmful or fatal if swallowed,”
  • “Harmful or fatal if absorbed through the skin,”
  • “Harmful or fatal if inhaled,” or
  • “Causes skin and eye irritation”

Class 2 materials are estimated to be fatal to an adult human at a dose of 5 to 30 grams.

Toxicity Class 3:  This rating is given to products that are slightly toxic. The signal word in this case is “Caution,”possibly followed by:

  • “Harmful if swallowed,”
  • “May be harmful if absorbed through the skin,”
  • “May be harmful if inhaled,” or
  • “May irritate eyes, nose, throat and skin.”

Class 3 materials are estimated to be fatal to an adult human at a dose in excess of 30 grams.

Toxicity Class 4:  Class 4 products are practically non-toxic. Water is included in this class. Class 4 may or may not require a signal word. If required, the signal word is CAUTION. This class must also read “KEEP OUT OF REACH OF CHILDREN.”

In addition to the toxicity rating, the EPA classifies pesticides into General Use Pesticides that anybody can apply and Restricted Use Pesticides that must be applied by or under the supervision of a certified individual.  A record of the application of a Restricted Use Pesticide must be kept.

For more information on signal words and toxicity ratings for pesticides, see this article from the National Pesticide Information Center.

CategoriesClean Tips How To's

How To Use Hand Sanitizers

Hand Sanitizers
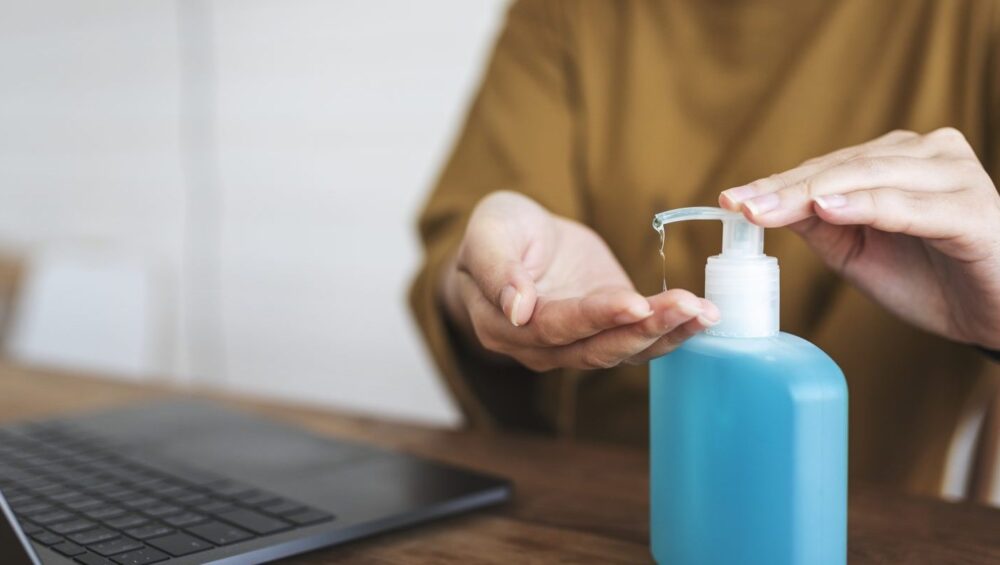
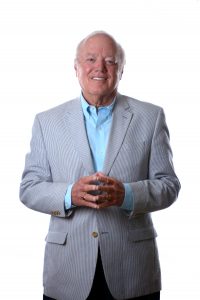
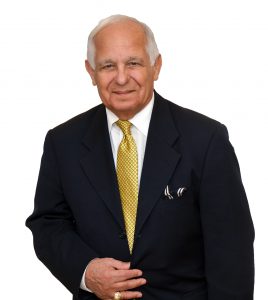
by Gus Scannapieco, Certified Clinically Clean® Specialist

Hand sanitizers provide a convenient alternative to hand washing when soap and water is not available. They are effective against bacteria at 99.9% and they also kill some, but not all viruses.

We’ve discussed kill logs before on DisinfecTips, and while 99.9% seems like a lot because it’s almost 100%, that’s not how kill logs work. A kill log of 99.999% is much more effective against viruses and bacteria.

Soap and Water to the Rescue

According to the Centers for Disease Control and Prevention plain soap and running water is one of the most important steps consumers can take to avoid getting sick and to prevent spreading infections to others. If soap and water are not available, the CDC recommends using an alcohol-based hand sanitizer that contains at least 60 percent ethyl alcohol or 70 percent isopropyl alcohol.

Do hand sanitizers kill coronavirus?

Hand sanitizer can help protect you from coronavirus, but hand washing with soap and water for at least 20 seconds is as effective, and better for you. Soap is safer than alcohol. Both soap and hand sanitizers however are effective against coronaviruses because coronaviruses are enveloped viruses.

Enveloped viruses have an outer membrane that can be punctured by scrubbing with soap and water or using a hand sanitizer with 60 percent or more of alcohol. Scrubbing with either cause these pathogens to lose their structure and stop infecting.

As with all hand sanitizers, you have to use it correctly for it to be effective.

How To Use Hand Sanitizers Correctly

Many people just dab a little hand sanitizer on their hands, rub for a second, and go on their way.  But that’s not the correct way to use hand sanitizers. Instead, the CDC specifically recommends covering your hands in sanitizer and rubbing them together until they’re dry, which will likely take about 20 seconds. Read the label to determine how much hand sanitizer to apply.

You’ll also want to make sure you’re using an alcohol-based hand sanitizer that is between 60 to 95% alcohol. These products usually contain ethyl alcohol (ethanol) and isopropyl alcohol.

There have also been questions about whether to use products labeled antibacterial or antimicrobial. The main difference between the two is the types of microorganisms they act on. Antibacterial products prevent the development of bacteria, but antimicrobial agents like alcohol-based hand sanitizers prevent the spread of bacteria, fungi, and some, but not all, viruses.

Hand sanitizers are not effective against norovirus or Clostridioides difficile (C. diff).  Soap and water do a better job at killing these germs.

In addition, many studies show that hand sanitizers do not work as well if your hands are heavily soiled or greasy. And, studies are ongoing about whether or not sanitizers can remove harmful chemicals from your hands.

Residue Can Trap Bacteria

If you’re in a situation where you’ve used hand sanitizer several times in a short period and you notice a build-up or film on your hands, wash your hands immediately. Hand sanitizers can create a film on your hands that harbor germs beneath the film.

Ongoing Research

In April of 2019, the U.S. Food and Drug Administration (FDA) issued a final rule on the safety and effectiveness of hand sanitizers. There were 28 ingredients including triclosan and benzethonium chloride that were deemed not eligible for use in consumer antiseptic rubs (hand sanitizers). The report also mentioned needing more data on three other active ingredients including ethyl alcohol to help the agency ensure these products are safe for regular use.

The FDA does not provide approval of any hand sanitizers however the FDA does provide a list of hand sanitizers that you should not use. The most recent update contains a list of hand sanitizerscoming from Mexico that were labeled to contain ethyl alcohol, but were found to contain metha

CategoriesClean Tips How To's

How To Read A Safety Data Sheet

Safety Data Sheetby Stephen Lawson, COO of Aseptic Health and a Certified Clinically Clean® Specialist

One of the many regulations for disinfectants is the creation of an SDS or Safety Data Sheet. This document is created by the chemical supplier. It is basically a summary of information regarding hazards or precautions for using the product safely.

The document is presented in a standard 16-section format. This format adheres to the Globally Harmonized System of Classification Labeling of Chemicals (GHS) created in 2012. (Before that time Safety Data Sheets were known as Material Safety Data Sheets or MSDS.)

Who Uses A Safety Data Sheet?

Chemists, janitors, carpet cleaners, restaurant workers, HVAC installers, engineers, manufacturers…anyone who works with hazardous chemicals understands the benefits of referring to the SDS before using a product. As we have said before, reading labels is important.

And in fact several agencies involved with worker safety, including OSHA, require Safety Data Sheets to be accessible at all times (and even to be archived for 30 years after the chemical is no longer in use)!

By accessible, OHSA means accessible for reading and/or printing within the work space whether by electronic means or in a printed form.

In addition OSHA requires that employers provide training on how to read and understand the SDS.

Important To Your Health

The SDS includes important information regarding chemicals such as:

  • Properties of the chemical
  • Potential hazards (health, fire, reactivity, environmental)
  • Protective measures (personal protective equipment required)
  • Safety precautions for handling, storing, transporting the chemical

What you learn from reading a safety data sheet can save your life. Especially sections 2, 6 and 8 which cover types of Personal Protective Equipment necessary for safe handling and use.

16 Sections of the Safety Data Sheet

The standard 16 sections of the Safety Data Sheet are the backbone of employee safety and include:

  1. Identification
  2. Hazard(s) identification
  3. Composition/information on ingredients
  4. First-aid measures
  5. Fire-fighting measures
  6. Accidental release measures
  7. Handling and Storage
  8. Exposure controls/personal protection
  9. Physical and chemical properties
  10. Stability and reactivity
  11. Toxicological information
  12. Ecological information
  13. Disposal considerations
  14. Transport information
  15. Regulatory information
  16. Other information

Section 1 identifies the chemical on the SDS as well as recommended uses. It also provides the information of the manufacturer or supplier.

Look to Sections 2, 6 and 8 to know what hazards to watch out for and what personal protective equipment (PPE) is needed during normal use. Examples of PPE include:

  • Gloves
  • Respirators
  • Goggles
  • Clothing
  • Face shield

Shop floor employees, safety managers, office workers, and even the clients that use your products need to be clear about any chemical hazards and safety PPE.

Section 2 includes the hazards of the chemical and the appropriate warning information associated with those hazards.

Section 3 identifies the primary ingredient(s) contained in the product. Where trade secrets are claimed, this section includes other safety information if applicable.

Section 4 includes basic first aid information for anyone who has been exposed to the chemical.

Section 5 describes measures for fighting a fire caused by the chemical.

Section 6 provides recommendations in case of spills or leaks including containment and cleanup to prevent or minimize exposure to people, property or the environment. It may also include recommendations depending on the size of the spill and its impact.

Section 7 provides recommendations for safe handling and storage of the product.

Section eight details exposure limits, engineering controls, and personal protective equipment (PPE) measures that can be used to minimize worker exposure. Type of PPE or necessity of PPE depends on chemical composition.

Section 9 identifies appearance and other information that you need know such as freezing and boiling points, the product’s pH among other chemical properties.

Section 10 is broken into 3 parts: reactivity, chemical stability, and other and describes any reactivity hazards.

Section 11 identifies any known toxicological and/or health effects.

Sections 12 and 13 detail environmental impact if released and disposal considerations.

Section 14 includes information for shipping and transporting the chemical.

Sections 15 and 16 are basically where the manufacturer or supplier of the chemical provide any other regulatory information or other information that a user may find helpful.

Only A Starting Point For Safety

The information on an SDS is only a starting point for safety measures in your workplace. Depending on the physical characteristics of the work area or even the abilities of employees—such as ability to speak and understand the language—you may need to add to and increase safety policies.

CategoriesClean Facts Clean Tips

What Does Non-Reactive Really Mean?

We advertise our product using a lot of “non” prefixes. Non-irritating. Non-caustic. Non-corrosive. Non-reactive. In other words, it won’t irritate your skin, it won’t harm you, it won’t corrode your metal pipes, but what does “non-reactive” really mean?

The simplest definition is to say that it will not react chemically with surfaces or other ingredients because it is neither acidic nor alkaline.

When cooking, have you ever come across a recipe that calls for you to use a nonreactive bowl or saucepan? That is because acidic ingredients such as red wine or vinegar can cause the pan or bowl to discolor or pit. Stainless steel is often used in cookware, because of its nonreactive qualities. Aluminum, tin or copper are examples of cookware that reacts poorly with acidic ingredients.

Another place in your home that it’s good to know whether a cleaning chemical is nonreactive are your countertops, mantles and floors. Many cleaning chemicals react poorly with marble, granite and other stone.

Cleaning chemicals that are highly reactive include bleach (sodium hypochlorite) and hydrogen peroxide as well as certain botanicals. Read your labels. Do not use these chemicals on hard and soft surfaces for which they are not intended.

CategoriesClean Facts Clean Tips

What Is A Neutral pH?

Neutral pHby Autumn Ryan, Founder and CEO, Aseptic Health

What does it mean to have a neutral pH? Neutral solutions have a pH of 7.0. Water is an excellent example of a neutral solution. Add a solution to water and the pH (or potential of hydrogen) changes. Your lemonade becomes acidic. Your bicarbonate of soda becomes alkaline or basic.

The pH Scale

The pH scale goes from 1 to 14 with 7 being neutral. Anything below 7 is considered to be acidic. Anything above 7 is considered to be basic. Because it is a logarithmic scale, each number is 10 times more powerful or less powerful than the next number. A pH of 8 is 10 times more basic than water and a pH of 9 is 100 times more basic and so on.

Extreme pH on either end can cause severe harm. Alkali burns to the eye are worse than acidic burns because substances that cause alkali burns contain lye, lime or ammonia. Think liquid drain cleaner. But you can also get severe burns from acidic chemicals. Vinegar, which is a weak acid, wouldn’t do much harm, but car battery acid, which is a strong acid, will.

Buffer Solutions

Buffer solutions are often used in the cleaning industry to manage the pH of water to resist change upon adding the acidic or basic ingredients necessary for adequate cleaning.

Why Know The pH Of Cleaning Solutions?

The reason it is important to know the pH level of the cleaner you’re using is that the pH can have an effect on the material you’re cleaning. Strong acidic or strong basic cleaners can cause fabric dye to run or its sheen to be affected. Cleaners that work effectively that are closer to the neutral scale are considered safer to use with all materials. [For those in the soft surface cleaning industry, Cleanfax magazine published an excellent article in April, 2020 on The Role of pH in Cleaning.

For household cleaning, remember basic solutions are used for cutting through dirt, grease, proteins, oils and other organic items. Acids are typically used for removing calcium, rust and other minerals. But there are some very effective cleaners that come closer to neutral. Dish soaps, for example, are usually in the pH range of 7 to 8.

Let’s take a look at some other common household cleaners and their pH levels.

Chlorine Bleach, pH 11 to 13

Ammonia, pH 11 to 12

Borax, pH 10

Baking Soda, pH 8 to 9

Vinegar, pH 3

Because chlorine bleach and ammonia are highly basic, we know that they are corrosive and should be used in a well-ventilated room. Also bleach and ammonia are not safe to be mixed with other ingredients.

Borax is often used as a laundry booster to break down oils and organic dirt. At a 10 on the pH scale it is still corrosive, but not as much as bleach. Baking soda may be a better alternative as it is still alkaline, but with a pH of 8 to 9 is not considered corrosive.

On the other end of the pH scale at a pH of 3 is vinegar, an acidic cleaner that many believe to be the perfect all-purpose cleaner. While it’s great at removing mineral deposits, it can corrode surfaces. Do not use vinegar on wood, stone, waxed surfaces, plants, your dishwasher, knives, washing machine, small appliances or electronic screens.

For more information contact us!

CategoriesClean Facts Clean Tips

What Is Biofilm?

Biofilmby Autumn Ryan, Founder and CEO, Aseptic Health

I feel like I should disclaim this article as not suitable for all audiences. If you’re squeamish, you might be grossed out, and you’ll definitely be more careful about what you touch from now on. The subject is biofilm on hard, non-porous surfaces. Biofilms are communities of microorganisms that are attached to surfaces and play a significant role in bacterial infections.

There are either four or five stages of biofilm development. First the initial attachment—free-floating microorganisms such as Staphylococcus aureus—a hard-to-kill bacteria that causes all types of nasty infections from skin to heart to bone. The bacteria attaches to a surface, for example a table top in a hospital room or dentist office. At this stage the cells are readily able to detach and with regular cleaning can be interrupted or removed.

In the second stage the microcolony grows on the surface and enters an irreversible attachment where the cells lay flat against the surface and resist attempts to physically dislodge them. These cells then start creating a sticky, gooey slime.

In the third stage, the biofilm is formed. Dangerous biomaterial matures into muiti-layered clusters.

Stage four—for those who claim there is a five-stage development— is a further maturation of the biofilm where the biomaterial can become antibiotic resistant.

Stage five is where the biofilm reaches critical mass and begins dispersing to colonize other surfaces. Boom! A quick, infectious spread of disease.

More bad news: bacteria that form biofilms are much more resistant to antibiotics and antimicrobial solutions. According to the National Institutes of Health (NIH) more than 80% of all microbial infections are biofilm related and can be hard to diagnose and treat.

What do you need to know about cleaning biofilms?

First, let’s discuss where you’re likely to find biofilms in your home or workplace. Plaque buildup on your teeth is a biofilm. Scum covering a rock in a creek or clogged pipes and drains are biofilms. The pink ring in your dirty toilet is a biofilm. Same for the pink slime in your pet’s water bowl. (Please clean your pet’s water bowl often if not daily.)

Biofilms act as the glue that holds bacteria to a surface and makes it easier for bacteria to live in a colony and therefore easier to cause of an infection. That’s why it is so important to break through and remove the biofilm during cleaning. It takes, for lack of a better term, elbow grease to cut through the biofilm. With regular cleaning you’re less likely to incur biofilm because you’re often interrupting the first phase of biofilm development (where cells can be readily detached from the surface they are attempting to cling to).

Once clean, your surface is ready for disinfecting to kill any remaining germs. Just like when you use a toothbrush to scrub the plaque from your teeth then use a mouthwash to kill the odor causing bacteria.

There are a few disinfecting processes that can actually penetrate the biofilm, killing the bacteria living there.  This one-step cleaning process is very efficient. It can also be very toxic. Read the label. You’ll want to use products with a close to neutral pH and a category 4 toxicity level on the EPA chart, such as products containing stabilized chlorine dioxide or sodium chlorite. Also note the kill log which describes how effectively the product kills bacterial. (See my article on kill logs to read about the importance of killing germs quickly.)

Remember, regular cleaning reduces biofilm buildup.

CategoriesClean Facts Clean Tips

How To Clean

How To Cleanby Dana Ryan, Certified Clinically Clean® Specialist

Learn how to clean! Fox News broke a story last week that “amid coronavirus, more than a third of US adults are using cleaning products incorrectly.” The story cited a recent study commissioned by the Centers for Disease Control and Prevention (CDC) and claimed “these practices pose a risk of severe tissue damage and corrosive injury and should be strictly avoided.”

The survey was conducted in May 2020. There were 502 respondents and questions ranged from what respondents knew about adequate ventilation when using cleaners to keeping household cleaners out of the reach of children and the don’ts of mixing cleaners with other household ingredients, among other topics. When asked “Have you ever heard that bleach should not be mixed with vinegar, less than 40% of the respondents answered that yes they had heard this. To be clear, mixing bleach and vinegar creates a potentially lethal chlorine gas.

MORE ON MIXING CHEMICALS

Fortunately more of the respondents had heard that bleach should not be mixed with ammonia, but still more than 30% of the respondents had not. When bleach is mixed with ammonia, toxic gases called chloramines are produced. Exposure can cause coughing, nausea, shortness of breath, watery eyes, chest pain, irritation to the throat, nose and eyes, wheezing and pneumonia and fluid in the lungs.

While we’re on the subject of mixing, when making a dilute bleach solution, only use room temperature water. Less than 25% of the respondents knew this. The reason is that hot water decomposes the active ingredient of bleach and renders it ineffective.

Also, do not mix bleach with rubbing alcohol. And, do not mix vinegar with hydrogen peroxide (this makes peracetic acid).

OTHER UNSAFE PRACTICES

Sixty percent of respondents said they cleaned their home more frequently in light of the pandemic, but according to their answers they are doing so in unsafe ways.

  • 19% used bleach on food such as fruit or vegetables
  • 18% reported using household cleaning products on their skin
  • 10% reported misting their body with a cleaning or disinfectant spray
  • 6% reported inhaling vapors from cleaning or disinfectant products
  • 4% said they drank or gargled with diluted bleach, soapy water, or other cleaning or disinfectant solutions

None of the above should ever be practiced and each poses a risk of severe tissue damage and corrosive injury.

HAND SANITIZER WARNING

Another alarming statistic is that less than 40% of respondents knew that hand sanitizer should be kept away from children. In March, 2020 there were 79% more calls to the National Poison Data System related to hand sanitizer than the year before. Many calls were about children ages 5 years and younger. Swallowing just a tiny amount of hand sanitizer can cause alcohol poisoning in children. If you suspect your child has ingested hand sanitizer call 911.

The easiest way to clean the right way is to read the label on your cleaning product and follow the instructions. The label will indicate whether or not you need adequate ventilation or protective articles such as gloves or goggles, and when to keep the cleaner out of a child’s reach.

For more information contact us.

If you’d like more tips of the week, please Subscribe!